

How To Draw A Skull Front View
The human skull carries a lot of meaning and symbolism that can drag the depth of your artwork, assuasive the viewer their own interpretation of your expression. Non only this, merely the skull is also the foundation for existence able to draw a human caput. If you lot struggled with this in the by, and then this tutorial will instruct you on homo skull drawing with realistic detail to aid you on your way to greatness. These basics can be played around with and can exist meshed in with your choice of art style.
Table of Contents
- i Reasons for Skull Cartoon
- 1.1 Improvement in Your Cartoon Skills
- 1.two Symbolism
- 2 A Notation on Proportions
- 3 Instructions on How to Draw a Skull
- 3.1 Materials for Human Skull Drawing
- 3.2 Stride 1: Your Skull Outline
- three.3 Pace 2: Getting the Correct Proportions
- 3.4 Step three: The Nose and Eyes
- 3.5 Pace 4: Time for the Teeth
- three.half-dozen Step 5: Skull Outline, Jawline, and Structure
- iii.7 Footstep vi: Detailing Your Skull Sketch
- iii.8 Pace 7: Adding Dimension: Shading Your Human Skull Drawing
- 4 How to Draw a Skull from an Angled View
- v Peak Tips for Drawing a Skull
- 6 Oftentimes Asked Questions
- 6.1 How Difficult Is Drawing a Skull?
- 6.2 What Exercise Skull Drawings Symbolize in Art?
Reasons for Skull Cartoon
For many reasons, man skull drawings and skull sketches have been the muse for many artists. Information technology might seem strange to you, but the skull holds much symbolism and attracts those that least look it. It can teach you lot a lot about shading, where y'all tin can create contours and contrast without cartoon bodily lines. By the fourth dimension yous have completed your work, yous will securely capeesh the field of study thing for the amount of time your eyes have looked over its surface for any missing details.
Improvement in Your Cartoon Skills
The human skull is hidden underneath our muscle tissue and our peel. This is what gives each person'due south head its shape and depth. By studying and rendering what you run across from the os, you volition receive an inside look into the similarities and differences of each man caput. Yous will find how different our faces look when they are not covered in skin, and the act of drawing the skull tin experience almost primal. Practicing how to describe the human skull will profoundly increase your skills in fine art and cartoon.
Cheekbones are a complicated topic and the shading of someone's gaunt face is not any easier. A skull outline might be the answer to your tribulations. Wasting your art resources is no longer going to be a problem considering you will exist more than satisfied with the skill yous accept learned by practicing skull cartoon.
Symbolism
The human skull is not ever symbolized to represent something morbid. On the contrary, it can represent the appreciation of life. It can be a representation of humans being vain, as we see in Charles Allan Gilbert's depiction of a woman gazing at her reflection in the mirror, where the epitome and reflection is actually a skull. It could also mean transformation, or transitioning from life into the next realm, whatever it may be. Mexicans favor this belief in their holiday Dias de Los Muertos, where anybody joyously celebrates and remembers the dead. Skull drawings are, however, more than typically used to represent death – humans are mortal afterward all.
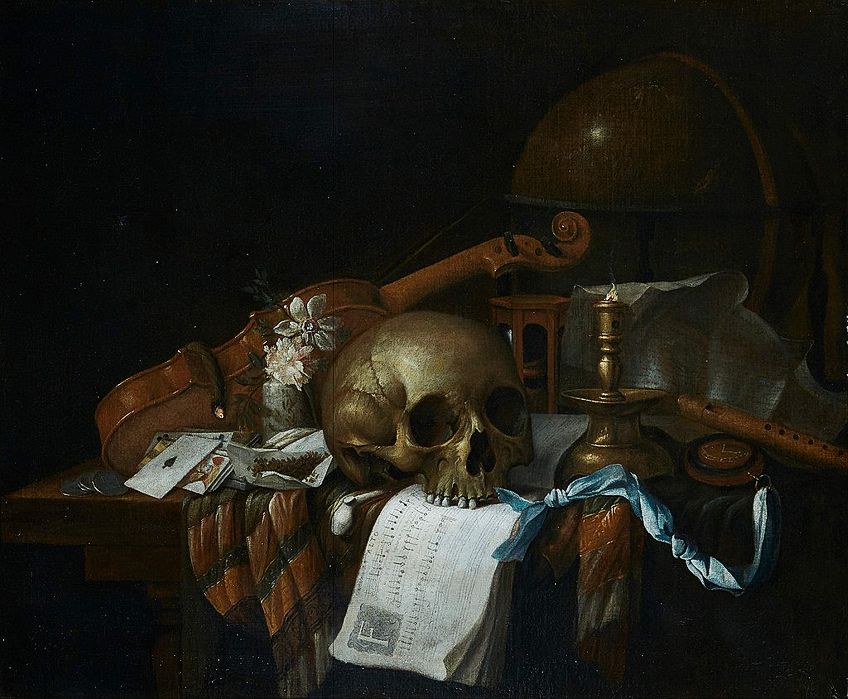 Vanitas nevertheless life with a skull, sheet music, violin, globe, candle, hourglass and playing cards, all on a draped tabular array(1662) by Cornelis Norbertus Gijsbrechts;Cornelis Norbertus Gijsbrechts, Public domain, via Wikimedia Commons
The 17th century saw humanity and the art earth through the Vanitas menses. Vanitas means "vain" in Latin. It was based on the appreciation for still-fine art, inanimate objects staged in a certain mode. It usually carried symbolism chosen by the artist. It was most popular in the Netherlands where the artists began to question life, death, and mortality. Nearly of these paintings and drawings had a depiction of a skull somewhere either in plain sight, or hidden, leaving a surprise for the eager eyes who spotted it.
A Note on Proportions
Nosotros are all quite unique in personality and physique. The contours of our faces and our heads will not be the same as the person to your right or your left. Your facial expressions are defined by your personality and no ane will be able to repeat the aforementioned. While this may be astoundingly true, there volition ever be the nuts to the shape of a human caput.
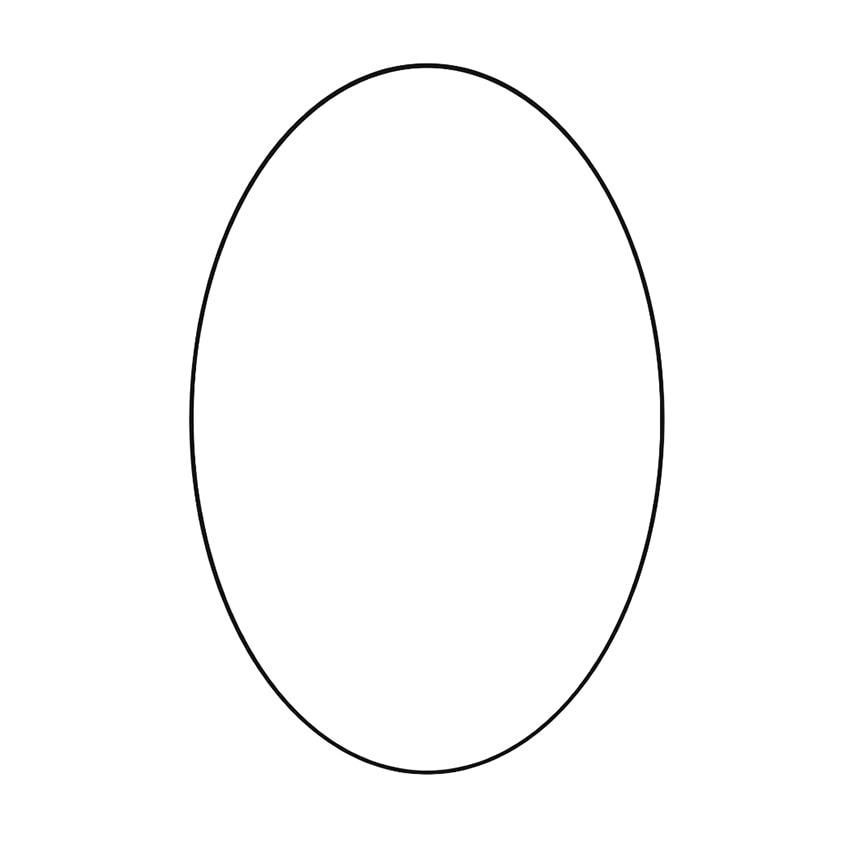
Learning to draw a skull outline will assistance you with your accuracy. Y'all can add someone's personality in one case you take their silhouette. In order to begin a skull sketch, yous must outset take a good, long await at a skull's face from the front. You lot might notice that information technology has the shape of an egg pointed down – rounded at the top and narrow at the bottom. If you plan on drawing an center inside the skull socket, and so information technology is a good idea to recall that muscles and flesh take up more space. Basically, your middle will seem much smaller than the actual socket. Information technology is of import to have notation of the following proportions:
- The length of one heart is the same length as the distance between your eyes.
- The length of both of your eyes is just nearly your face'south width.
- If you desire accurate proportions, divide the face you are cartoon into iv sections by drawing a vertical line and crossing it with a horizontal line, both through the eye.
- The width of one of your eyes is the same altitude betwixt the bottom of your nose and either of your eyes.
Instructions on How to Draw a Skull
Proportions are now in the bag! Your artwork when drawing human faces will no longer look like a depiction of an alien. The next affair to work on is drawing the actual skull. Beneath, we volition provide a list of recommended materials as a well as step-by-step instructions on how to describe a skull realistically.
Materials for Human Skull Drawing
Whether you are working with a tablet for graphics drawing or if yous prefer the old-school style of pencil on newspaper, then these instructions volition get you lot through it all. Your art supplies might need re-stocking, or else y'all tin haul them out of your cupboard. So, what materials or tools do you demand for skull drawing?
- Pencils: We recommend the Prismacolor Premier Graphite Pencils.
- Paper, board, or sail: We recommend the Strathmore 300 Serial Drawing Pad.
- Eraser for mistakes: We recommend the Pen Eraser Set up with Kneaded Erasers, Mucilage Erasers, and Pencil Erasers.
- Tablet (optional): We recommend the XOPPOX Graphics Drawing Tablet
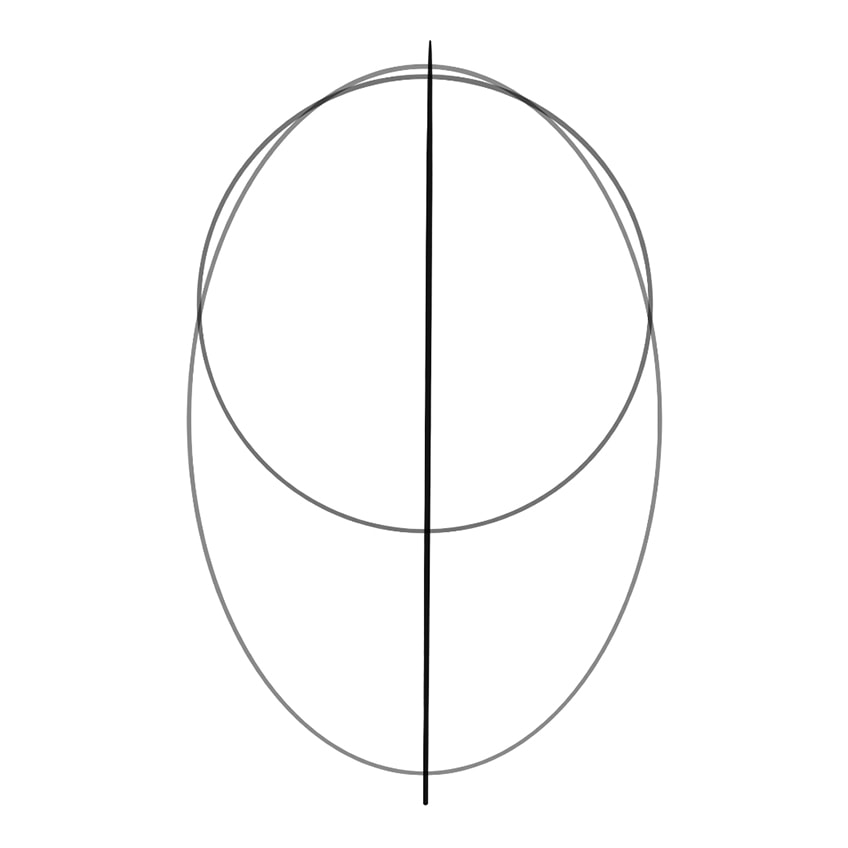
Footstep i: Your Skull Outline
First, you need to draw the shape of an oval – as we have mentioned, the human head is similar to that of an egg shape pointed downwards. Find the heart of this. This step requires very faint lines and so that they are not visible at the end.
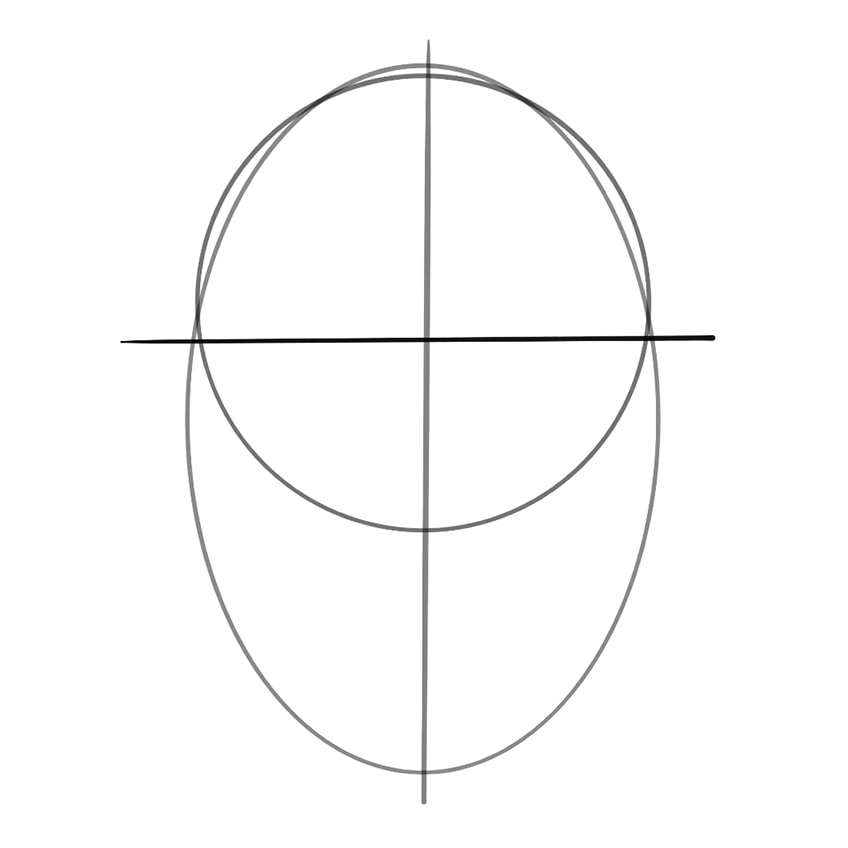
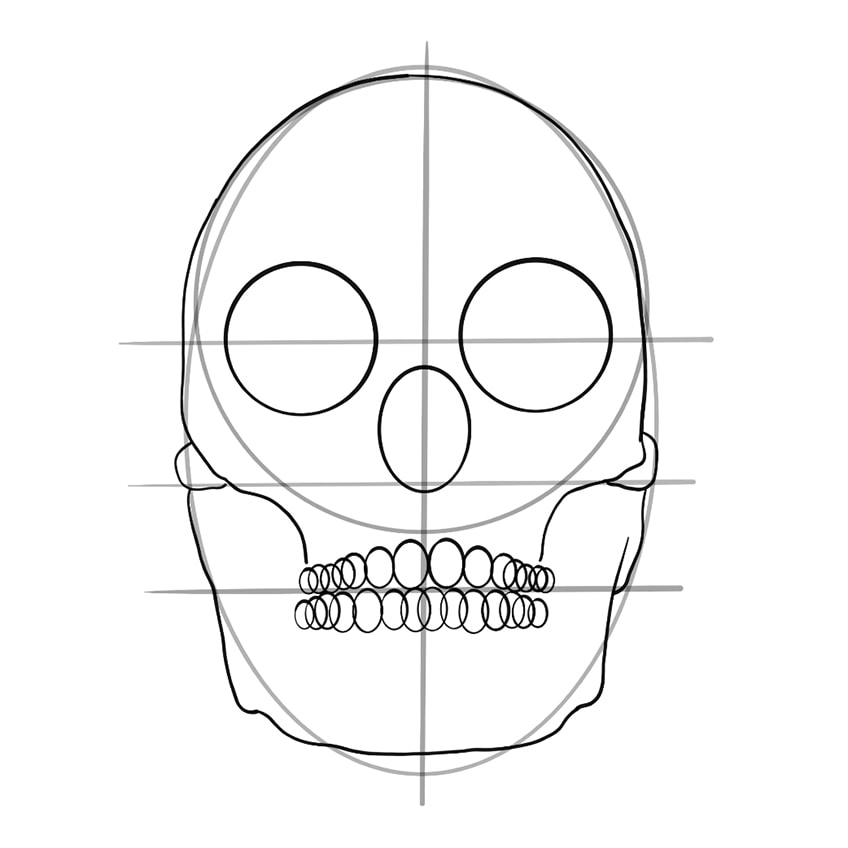
Step 2: Getting the Right Proportions
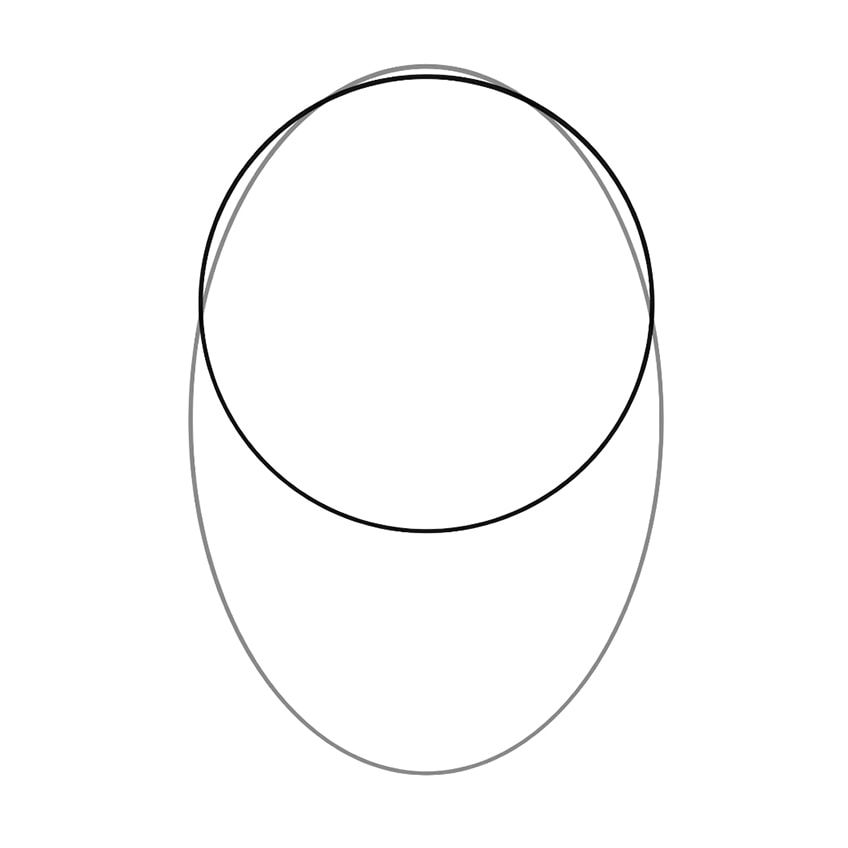
In order for yous to put the optics in the correct place without it seeming off-balance, y'all demand to divide the oval up.
- Exercise this past drawing a circumvolve inside the top half of the oval. The bottom half must be left with the space for the jaw, chin, and teeth.
- Next, as we have mentioned above, depict a line going vertically right through the middle of the oval shape. This will assistance u.s. go along the nose in the middle.
- Side by side, as you might have guessed, is to draw a line going horizontally through the centre of the circle shape, non the oval. This is magical assist when information technology comes to symmetrical heart placement.
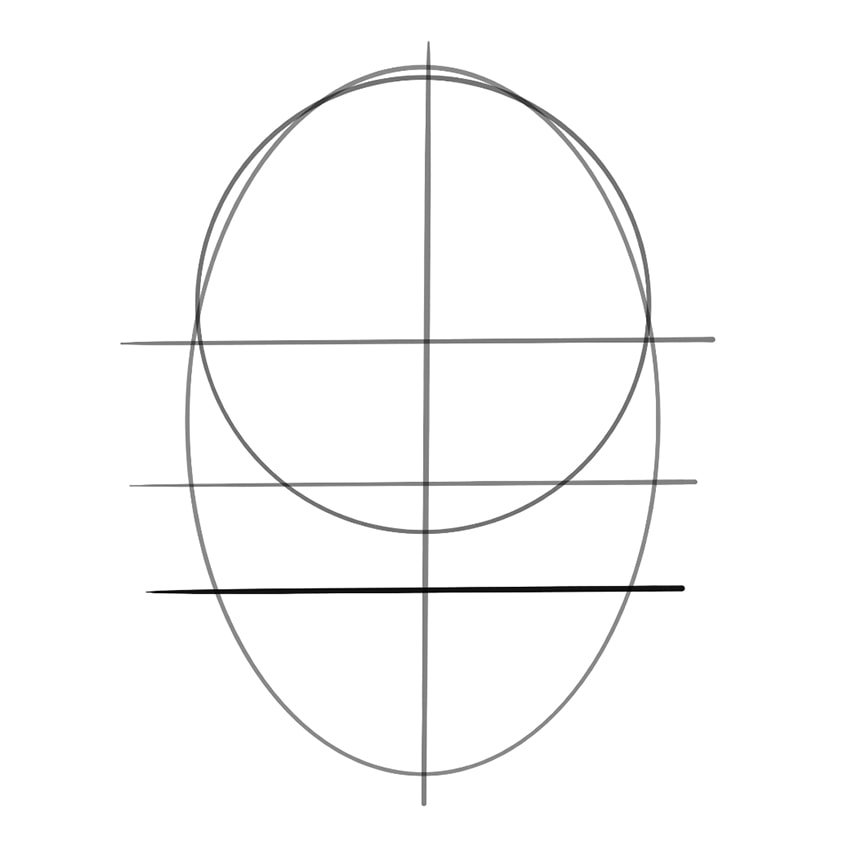
- Following that, a second horizontal line is needed, but this time through the oval you offset drew. This creates the 4 sections we mentioned earlier that help exponentially with proportioning someone'due south face and adding symmetry to their cheekbones. This tin be helpful when drawing elf-like faces.

- Notwithstanding another horizontal line must exist drawn at the bottom department of the oval. This is for drawing accurate mouths that are sitting in the right place. The tiptop lip will be placed above the bottom horizontal line and the lesser lip below information technology.
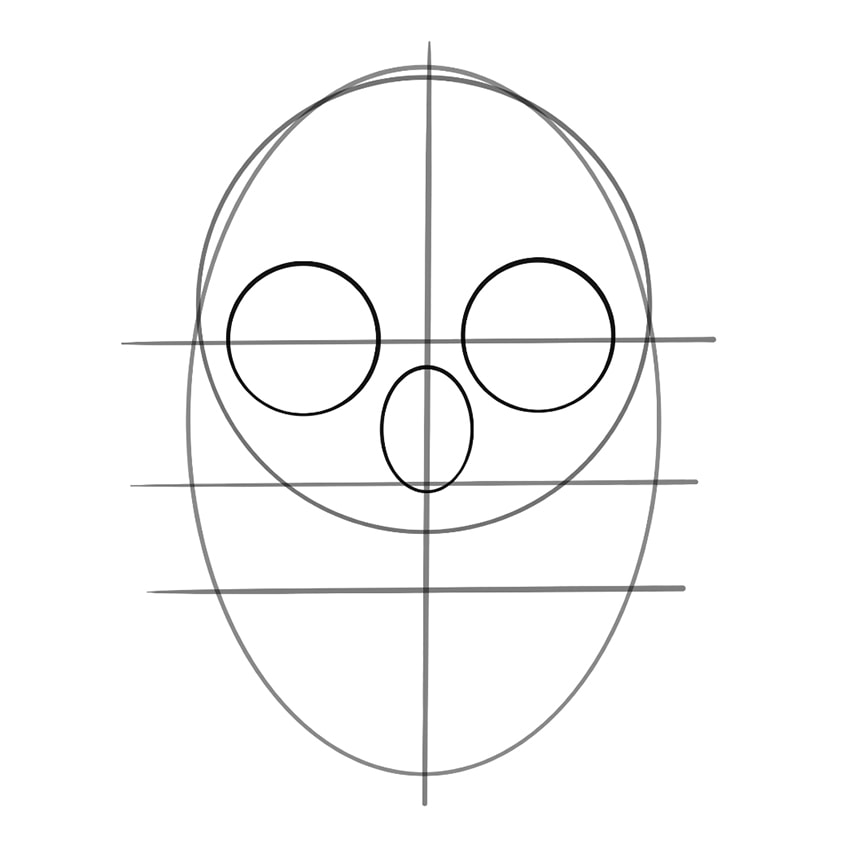
Step 3: The Nose and Eyes
Where would we exist without our eyes and nose? Nobody knows! Our adjacent run a risk in the art of skull cartoon is the addition of your nose and eyes.
- For this, we must focus on the very first horizontal line going through the elevation third of the oval shape. For each side (both left and right), you lot must depict a circle using the horizontal line as the divider. Make sure that half the circle is at the acme and the other half is below the line.
- When drawing the nose, we volition focus on the vertical line dividing the oval in half. Draw some other oval shape using the line as the heart divider, ensuring that the lesser of the oval only just overlaps the middle horizontal line.
Step four: Time for the Teeth
Ever remember to make utilise of the horizontal and vertical lines – they are your symmetry guidelines!
- Make utilise of the lower horizontal line for the teeth, as well as the vertical one. To go teeth that look like they had braces at some point in their life, draw one bigger circle on one side of the vertical line and the same on the other side. Work your way to each end by drawing smaller and smaller circles on either side, stopping in the middle.

Step 5: Skull Outline, Jawline, and Structure
If you wait at what you have drawn now, it might look to someone without an artistic center more like a kindergarten student's attempt at drawing a snowman. This is not the end of the world, as this is what this next step will improve upon. By adding profile lines, you will start to encounter the image of the skull and not just the oval shape.
- It is now time to forgo the lighter lines yous used earlier for the symmetry shapes. Using a darker pencil and firmer mitt, describe the outline of the skull's shape. This is also known equally the outer shape of the skull'due south silhouette.
- Using the top of where the teeth circles end as the middle of your cheeks, draw the lines that will form the cheeks symmetrically.
- Now, to become the jawline, turn the bottom of the oval (the pointed function) into a more than squared shape. Be sure to add some bumps over the line then that it looks more realistic, just like a human jaw and skull.
Calculation all these circles may seem a deadening task and your impatience might want to have y'all diving right into the jawline with all its bumps and grooves. Unless you have an extreme centre for symmetry, this is the advisable road to start drawing skulls – practise not skip these steps because you might stop up with a skull drawing that looks like it was made out of wax and melted ever so slightly!
Symmetry is a key factor when it comes to skull drawing.
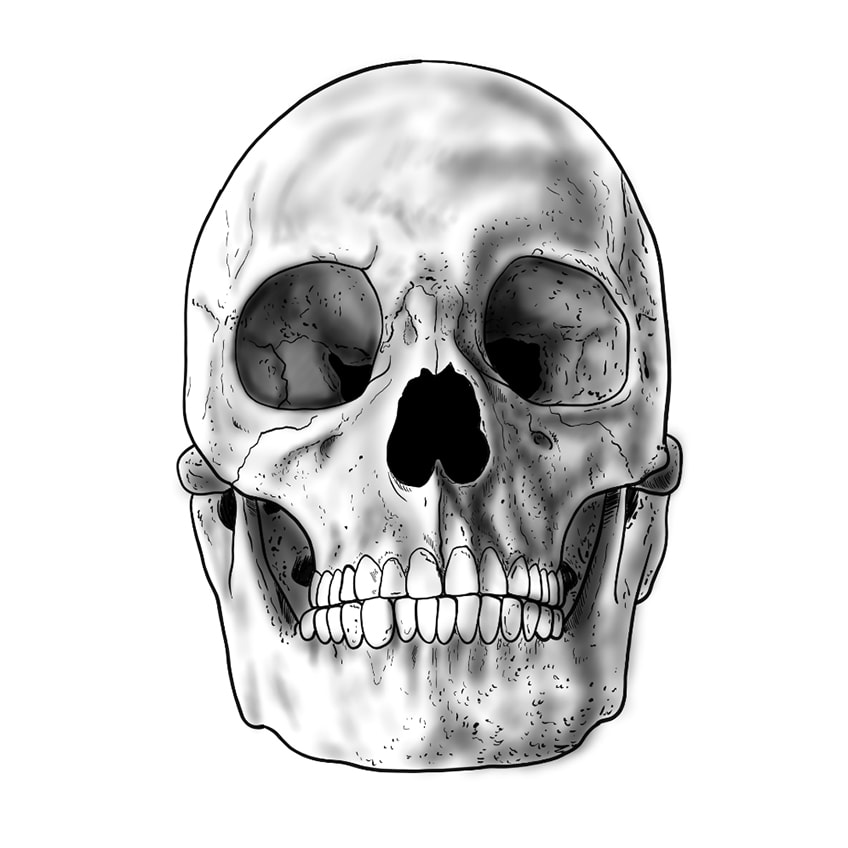
Footstep six: Detailing Your Skull Sketch
Whip out yet another and fifty-fifty darker pencil for this next step. This is where things go exciting and a petty more tricky. Some say that beauty is in the details, and in this case, it is true.
- In guild to turn the circles or ovals into teeth that look similar teeth, take your pencil and depict over each of the circles to give them some detail.
- The eye sockets will have jagged, aptitude, or curved lines instead of perfectly rounded shapes. This is an of import pace if you are trying to depict a realistic skull.
- In guild to draw the eyes, olfactory organ, and cheeks in more detail, you can add together in some shading with darker colors. This makes them more distinct confronting the outline of the skull.
- If the skull is an sometime skull, it might take a few indents, cracks, or scratches over the surface of it. This is a keen particular to add together for realism.

Step 7: Adding Dimension: Shading Your Human being Skull Cartoon
Some artists accept mastered the skill of dimension and the particular of shading. So much so that it looks like a 3D image has been printed onto paper or canvas. This next step is vital for bringing life into your drawing – ironic is it not? In order to go this right, you must make sure that you lot have a graphite pencil set with all the different light and dark pencils for shadows and highlights, respectively.
- Outset shading with a lighter pencil and try not to printing down besides firmly with it. You can always go back to your pencil set and whip out a darker one if the function you are shading requires it. This also helps to prevent your hand from smudging your hard piece of work and ruining the final result, as darker pencils are highly prone to smudging.
- If you are drawing with a pencil in hand, a cotton wool swab is useful for bringing out the shading.
- If a tablet for graphics drawing is your game, and so you tin utilise the soft brush tool to emphasize the shading also.
- A human skull is hollow in shape, which means that the within of the hollow skull will be very dark, almost black, in color. This will add a lot of definition likewise as the hollow event.
- Light will always come from a certain angle. To make your skull expect realistic, it is advisable to have a focal betoken from where the lite shines onto the skull. Of course, the side where the light supposedly hits it will exist lighter than the other side. Brand sure that y'all add more shading on the side where the light does not shine.
- In one case all the definition has been added to your skull, you tin can finish off past erasing whatsoever of the earlier foundation lines yous drew that might still be visible. This might be especially necessary for outlining contour lines.
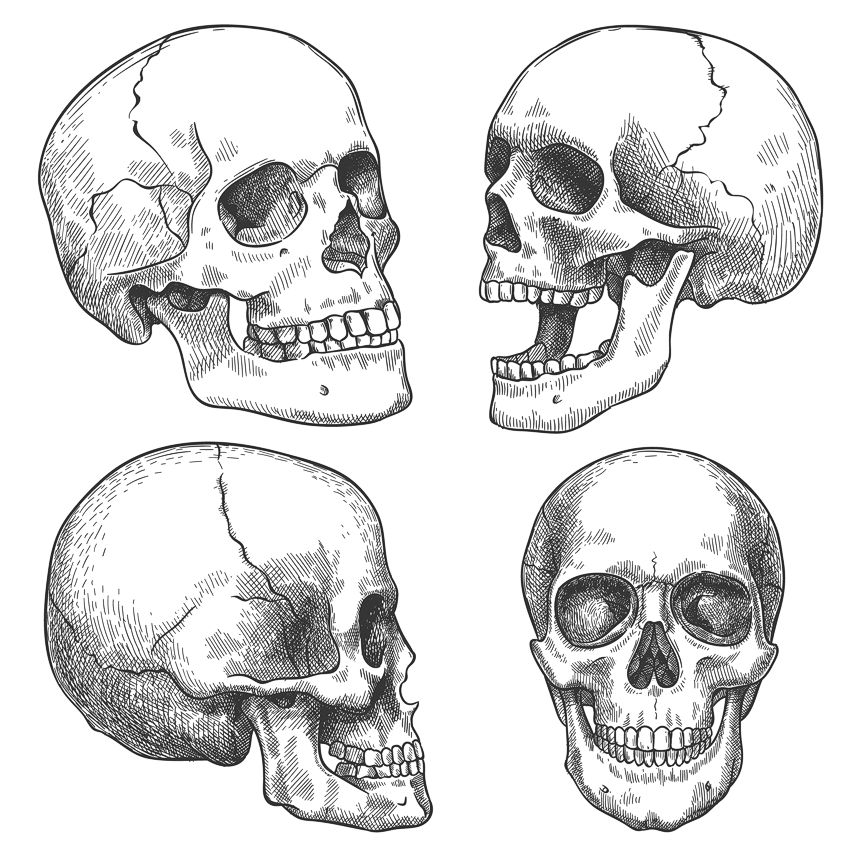
How to Describe a Skull from an Angled View
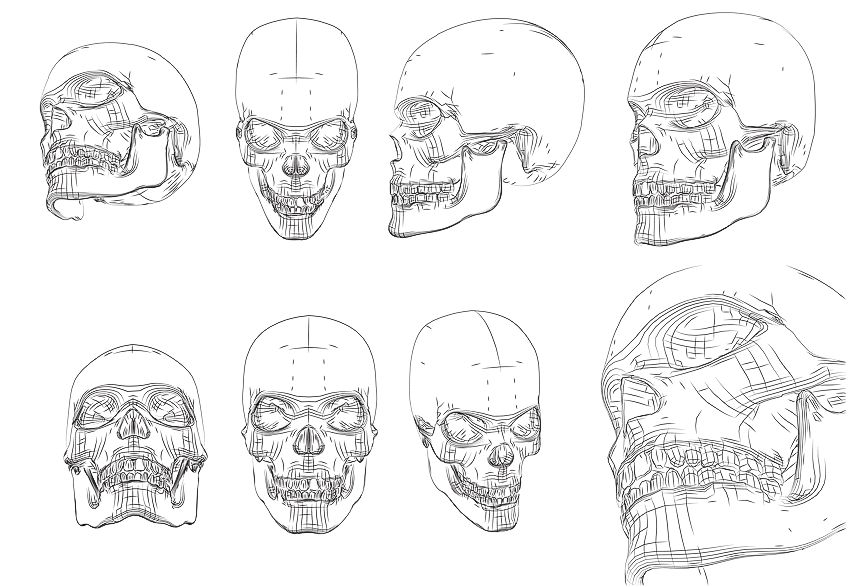
The entirety of the instructions higher up is based upon a head-on view of a skull. Sometimes life is not so straightforward and you might accept to describe the skull from a profile perspective instead. Fearfulness not! You volition not have to relearn everything we just taught y'all, because the basic foundation lines remain the same. The just add-on is that of the foreshortening technique.
What is foreshortening, you say? Well, it is the ability to add depth or dimension to your artwork. Without it, your piece volition lack realism. Aspects of the human skull in subjects that are seemingly behind the skull, the opposing profile, volition demand to exist made smaller and filled with much darker shading due to the light shining on the profile facing you. The aspects that seem to be at the forepart of the cartoon, the side of the profile facing the viewer, must be larger and have less shading so that it seems as though the light is shining on it.
Top Tips for Drawing a Skull
- Cut a moving picture of a skull from a mag or download one online so that you lot have something to look at and reference. This helps if you are not as accustomed to the curves and shadows or a skull, and can be applied to whatever subject matter.
- Planning ahead is the ultimate pace to a successful and accurate drawing of a skull, no affair the species. Make sure that you depict the shapes beforehand so that your symmetry is on point.
- In order to exercise the shading that shows the angle from which the low-cal is shining on the skull, take any erstwhile inanimate object that has a similar shape and practice the shading – note how the low-cal part is where the lite hits the object and the darker function is backside that.
- The teeth and the eye sockets of a skull are undoubtedly the highlights of all the features. What makes the eye sockets even more realistic is if you show cracks coming from them as a jagged fine line going circular in a round or rounded motion and ending nearly the jaw.
We've created a Google web story for this tutorial
Frequently Asked Questions
How Difficult Is Drawing a Skull?
It is undeniable that learning how to describe a skull accurately, and with realistic detail, will take some time, patience, and a whole lot of love. It is, notwithstanding, made much simpler if you follow the tutorial y'all accept just read. All of those shapes are non a waste material of fourth dimension if you lot are wanting a life-similar skull by the end of your sketch.
What Practice Skull Drawings Symbolize in Art?
Skulls tin accept different meanings to many different people. It has been used to symbolize the remembrance of our homo mortality and that our fourth dimension here on this earth is not permanent. It has also been used to represent transformation and the transition between life and death, or into the next "realm".

Source: https://artincontext.org/how-to-draw-a-skull/
Posted by: schuetzprould.blogspot.com
0 Response to "How To Draw A Skull Front View"
Post a Comment